So you went shopping and found the perfect frame for your “frame it yourself” piece. But everything is still sitting in plastic bags because you realized that you have to mount your work yourself and it’s terrifying you. Do you lace it? Do you pin it? How will you ever get it straight? What if you ruin your work?
I’ll admit that I’m not perfect at mounting my work. However, I find that practice makes perfect so let me share a few things that I’ve discovered as I’ve mounted some stuff of my own
Step 1: Buy the mounting board. I generally get mine at Hobby Lobby. The smallest they sell it is 8×10. If you need it in 5×7, order an 8×10 and ask them to cut it into 2 5×7 pieces. I have never had a problem with them doing this. If you don’t have a Hobby Lobby, you can find the acid free foam board at any place that frames stuff. Sometimes, they’ve given it to me for free because they cut it from a scrap. Generally, I pay less than $5 for the board. You will want to get your foam board the size of the inside of the frame and not the visible area (so if framing 5×7, get 5×7 board and not 4.5×6.5 board or it will just fall through the hole in the frame). If you have to get a custom size, make sure that you measure carefully.
Step 2: Measure the playing field. Take your tape measure and carefully measure the stitched area of your design. Make sure you go from furthest outlier to furthest outlier if you have vines or stuff going off the edge of the main part.
Step 3: Do some math. We are going to use the following formulas: (width of foam board – width of design) divided by 2 and (length of foam board – length of design) divided by 2.
For example: I am using 5×7 foam board. My stitched design is 4×6 exactly. My calculations are (5-4)/2= .5 for the width and (7-6)/2=.5 for the length
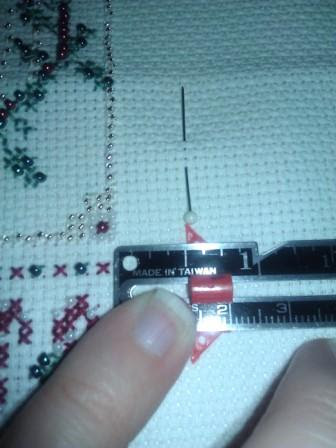
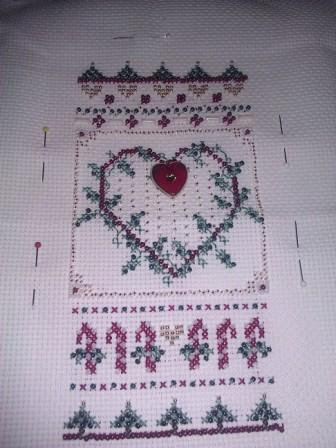
Step 4: Place some pins. Taking my ruler, I’m going to go to the furthest outlier on the left and measure .5 inches out to the left of it and I’m going to place a pin there. I will do the same on the right going .5 inches to the right. I will then do the same to the top and bottom. Keep the pin in the same line of holes when you do this. You may wish to place more than one especially for the length. **Note: Yes, you can baste thread here but I found the pins easier to remove.**
Step 5: Flip the piece. That’s right. Put the piece on a table right side down.
Step 6: Place the foam board. If you did it right, you should be able to use the pins as a guide for placing the foam board on the piece and it should keep things fairly centered.

Step 7: Initial pins. When you think you have things lined up with your guide pins, take a bunch of pins (I strongly, strongly recommend the kind with the little plastic colored heads because these are not the permanent pins and they are much easier to pull back out) and pin the fabric to the foam board.
Step 8: Lace! But only one side. I suggest lacing the side that is the longest. If you need help with lacing there are tutorials all over the internet. I generally using decent sewing thread and a regular sewing needle.
Step 9: Check your work. I promise, there is a method to my madness. We measured initially to try to get the board as close to the center as possible by measuring and placing guide pins. This is not always perfect. In this step, you can feel free to remove the guide pins and flip your work over. By lacing just one side of the piece, we can now remove those initial pins and carefully maneuver the foam board so it is even more centered. If you managed to get the piece perfect, you can skip to step 11.
Step 10: More pinning. As you move things around put your initial pins back in to keep things straight. Again, I strongly recommend the ones with the plastic ball heads because they are easier to pull out and you will probably adjust them several times. This is also the time when I pull things tighter to get out wrinkles and stuff.
Step 11: Final pinning. When you have things the way that you want them, you can start putting in your final pins. I recommend stainless steel flat head pins. Push them in as far as they will go. Then you can pull your temporary pins back out.
Step 12: Lace the other side. At this point, I will lace the other side up and then it will be ready to go into my frame.
So, there you have it. That is how I frame my pieces myself. Like I said, I’m always learning and adapting. If this is too scary, then you might consider stitching things that don’t have to be framed. But that’s another post 😉

Thank you for the wonderful tip. I will try this on my next piece to frame.
I have never tried framing myself on anything other than really small pieces. That being said, I have several large pieces just waiting. They have been waiting for YEARS! I may have to try this!
Awesome instructions…